4. Remote Container Deployment
In this section you will learn how to use Azure Container Instances to run serverless Docker containers in Azure with simplicity and speed. You will get hands-on experience deploying containers and linking those containers with data volumes.
Before starting on this section, make sure that you have access to the Azure Portal at https://portal.azure.com. You should have received an email inviting you to join an Azure Resource Group for the purposes of this course. You will have access to these resources for 72 hours.
My First Cloud Container
These instructions will take you through deploying a container with the Azure Portal, all of these commands can be executed via command line with Azure CLI.
Deployment
Azure Issue (21/11/2022)
Unfortunately, the path below for using the ‘Create a resource’ page is broken. Currently, when trying to click ‘Create’ on any offerings you’ll get a perpetual loading animation at the top of the page. This is an issue with Microsoft and not with any of your devices. Feel free to test the path below first as this could be fixed on the day of the workshop or sometime in the future.
Alternative instructions:
- In the search bar located at the top of the page, type ‘container instances’ (don’t hit enter!)
- Select ‘Container instances’ under the ‘Services’ section
- You should have no container instances visible so click ‘Create’
- Now you should be able to follow the rest of the documentation, starting from “Enter the following details…”
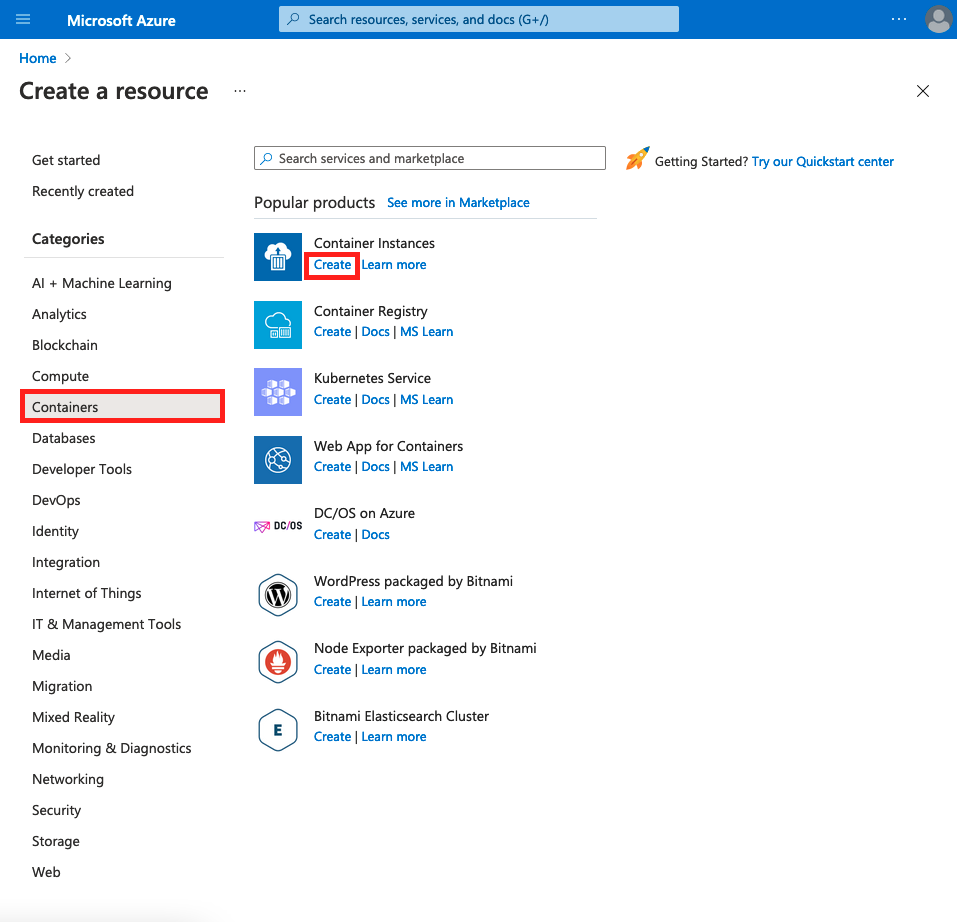
On Create a resource, select Containers from the Categories, and select Create under Container Instances.
Enter the following details:
- Subscription: Azure NCE
- Resource Group: rseCloudExplainTraining
- Container Name: myfirstcontainer-<initials>
- Region: UK South
- Image Source: Quickstart images
- Image: mcr.microsoft.com/azuredocs/aci-helloworld:latest (Linux)
This sample Linux image packages a small web app written in Node.js that creates a static HTML webpage. You should notice that in Image source you have the ability to choose from the Azure Container Registry, DockerHub, or other registries.
Proceed to the Networking page, here you can create a custom DNS name label for your container. This is similar to the DNS configuration you carried out in 3. Remote Virtual Machine. In the ‘DNS name label’ box, enter myfirstcontainer-<initials>.
Leave all other settings at their default values and select Review + create, followed by Create. This will deploy the container to Azure.
Once your container has been deployed (notice that this is quicker than deploying a VM), click Go to resource. Notice that the ‘Status’ is set to ‘Running’, this means your container is deployed and active. Next copy the ‘FQDN’ (the fully qualified domain name) and paste it in your browser. You should see the following webpage:
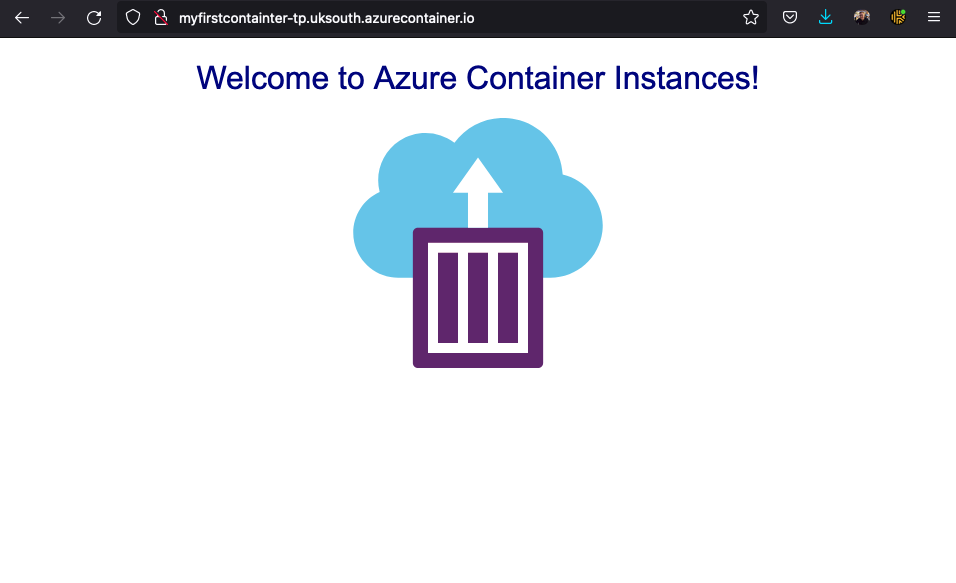
Congratulations! Within a few minutes and by configuring a few settings, you’ve deployed a publicly accessible application in Azure Container Instances.
Logging
Azure Container Instances automatically creates logs for all containers you deploy. Logs can be immeasurably helpful when debugging and troubleshooting issues with your container or the application it runs.
To view the container’s logs, navigate to your container in the Azure Portal, in the left hand menu under Settings, select Containers, then Logs. You should see the HTTP GET request generated when you viewed the application in your browser.
Clean Up
Just as when working with containers locally, you need to be conscious of container clean up. However, unlike local containers, leaving a container deployed and running on Azure will cost money so it is imperative to keep a close eye on what containers are running.
Once you have finished with a container, navigate to the Overview panel for your myfirstcontainer-<initials> instance, and select Delete at the top of the panel. Follow the instructions on the dialog to delete your container.
Deploy Your Web App
Remember earlier in the course when you created your own web app and pushed it to DockerHub? Now is the time to use it! If you have not yet been able to complete 2. Building & Deploying a Container, you can use my image at: timpowell/myfirstwebapp.
Azure Issue (21/11/2022)
Please refer to the top admonition on how to create resources whilst the path below is broken.
Again on Create a resource, select Containers from the Categories, and select Create under Container Instances.
- Subscription: Azure NCE
- Resource Group: rseCloudExplainTraining
- Container name: myfirstwebapp-<initials>
- Region: UK South
- Image source: Other registry
- Image type: Public
- Image: <USERNAME>/myfirstwebapp
Proceed to the Networking page, here you can create a custom DNS name label for your container. In the ‘DNS name label’ box, enter myfirstwebapp-<initials>. You will also need to open the port that your web app is exposed to. If you remember from 2. Building & Deploying a Container, in the Dockerfile you exposed the output of your container to port 5000. Add port 5000 and port protocol TCP.
Leave all other settings at their default values and select Review + create, followed by Create. This will deploy the container to Azure.
Once your container has been deployed (notice that this is quicker than deploying a VM), click Go to resource. Notice that the ‘Status’ is set to ‘Running’, this means your container is deployed and active. Next copy the ‘FQDN’ (the fully qualified domain name), paste it in your browser, and append :5000.
Your web app that you created locally earlier is now deployed on Azure and accessible anywhere in the world at <FQDN>:5000!
More Containers in the Cloud
In this section, we will be utilising the Azure Cloud Shell again. Similarly, to the Remote Virtual Machine instructions, the following instructions will be in Bash.
Too Long Didn’t Read
The command line commands are now getting quite long. Fortunately, in Bash you can use \ to go to a new line in the terminal without executing the command. This helps to make commands more human readable.
Create a Container Using Command Line
You can create a container by providing relevant information in a single command line command. On the Azure Cloud Shell, run:
az container create --resource-group rseCloudExplainTraining \
    --name myclicontainer-<initials> \
    --image mcr.microsoft.com/azuredocs/aci-helloworld \
    --ports 80 \
    --dns-name-label myclicontainer-<initials> \
    --location uksouth
From the information in the command above, you should recognise the image you are deploying. Once the az container create command completes, it will be accessible at http://myclicontainer-<initials>.uksouth.azurecontainer.io/. To check the status of your container, you can run:
az container show --resource-group rseCloudExplainTraining \
    --name myclicontainer-<initials> \
    --query "{FQDN:ipAddress.fqdn,ProvisioningState:provisioningState}" \
    --output table
You will see your container’s FQDN and its provisioning state.
Containers and Databases
More often than not, you may require an application in the container to write and read data from a database.
First, you need to create your database. For this example, you will create a Cosmos Database but the techniques learned here are not restricted to just Cosmos Databases.
In order to link the container to the Cosmos Database you will need to use environment variables and secured environment variables. The following command will create the Cosmos Database and save the endpoint address to the Bash variable COSMOS_DB_ENDPOINT.
COSMOS_DB_ENDPOINT=$(az cosmosdb create \
    --resource-group rseCloudExplainTraining \
    --name mycosmosdb-<initials> \
    --query documentEndpoint \
    --locations regionName=ukwest \
    --output tsv)
This command can take a few minutes to complete.
Next you will need to get the Cosmos Database connection key and store it as another Bash variable.
COSMOS_DB_MASTERKEY=$(az cosmosdb keys list \
    --resource-group rseCloudExplainTraining \
    --name mycosmosdb-<initials> \
    --query primaryMasterKey \
    --output tsv)
Now that you have your Cosmos Database setup and the relevant information saved to Bash variables it is time to create the container that can read and write to your Cosmos Database. azuredocs/azure-vote-front:cosmosdb is a training resource container image provided by Azure that runs a fictitious voting app
az container create --resource-group rseCloudExplainTraining \
    --name myvotecontainer-<initials> \
    --image mcr.microsoft.com/azuredocs/azure-vote-front:cosmosdb \
    --ip-address Public \
    --location uksouth \
    --environment-variables COSMOS_DB_ENDPOINT=$COSMOS_DB_ENDPOINT \
    --secure-environment-variables COSMOS_DB_MASTERKEY=$COSMOS_DB_MASTERKEY
The --environment-variables argument specifies which environment variables are passed to the container when it starts, however these can be retrieved in plain text format. --secure-environment-variables prevent plain text output, it’s a good security practice to ensure that sensitive information, such as connection keys, are not stored in plain text. The container image is pre-configured to look for these environment variables and apply them to its application.
It’s time to look at your voting app! Run the following to get your container’s IP address and paste it in your browser. Sometimes it can take a few minutes to fully start your container and its application.
az container show --resource-group rseCloudExplainTraining \
    --name myvotecontainer-<initials> \
    --query ipAddress.ip \
    --output tsv
Once the app is available, you should see something similar to this:
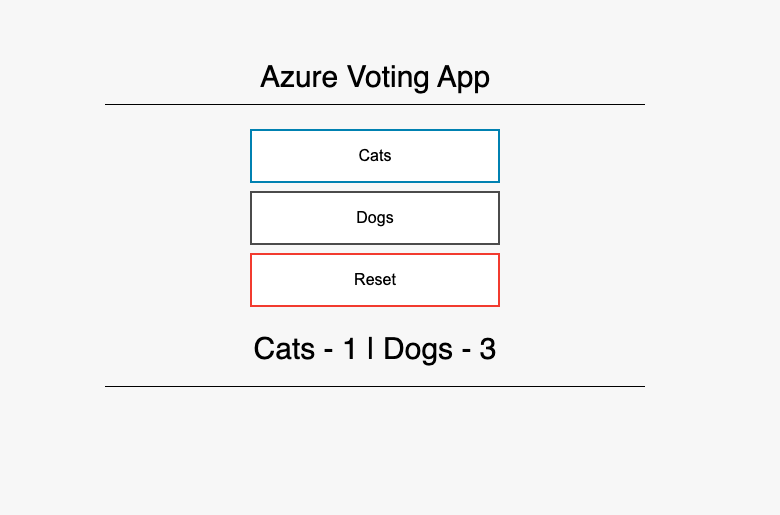
Try casting a vote for cats or dogs. Each vote is stored in your Cosmos Database instance.
Persistent Data
By default, Azure Container Instances are stateless. If the container crashes or stops, all of its state is lost. To persist state beyond the lifetime of the container, you must mount a volume from an external store.
Here, you’ll mount an Azure file share to your container instance so you can store data and access it later.
First, you’ll need to create a storage account and file share.
az storage account create --resource-group rseCloudExplainTraining \
    --name mystorageaccount<initials> \
    --sku Standard_LRS \
    --location uksouth
Some of the Azure specific Bash commands that follow look for the storage connection information in the environment variable AZURE_STORAGE_CONNECTION_STRING. You will need to set that now:
export AZURE_STORAGE_CONNECTION_STRING=$(az storage account show-connection-string \
    --resource-group rseCloudExplainTraining \
    --name mystorageaccount<initials> \
    --output tsv)
You now have a storage account and have set the connection information, now you can create a file share.
az storage share create --name myshare-<initials>
The final requirement to mount your file share volume in a container instance is the storage account access key. Save this as environment variable:
STORAGE_KEY=$(az storage account keys list \
    --resource-group rseCloudExplainTraining \
    --account-name mystorageaccount<initials> \
    --query "[0].value" \
    --output tsv)
You are now ready to create a container with your file share mounted as a volume.
az container create \
  --resource-group rseCloudExplainTraining \
  --name mycontainerfiles-<initials> \
  --image mcr.microsoft.com/azuredocs/aci-hellofiles \
  --location uksouth \
  --ports 80 \
  --ip-address Public \
  --azure-file-volume-account-name mystorageaccount<initials> \
  --azure-file-volume-account-key $STORAGE_KEY \
  --azure-file-volume-share-name myshare-<initials> \
  --azure-file-volume-mount-path /aci/logs/
As usual, it may take a few minutes for your container to deploy. Once your container has deployed run the following to obtain your container’s public IP address:
az container show \
  --resource-group rseCloudExplainTraining \
  --name mycontainerfiles-<initials> \
  --query ipAddress.ip \
  --output tsv
You should see a website that looks like:
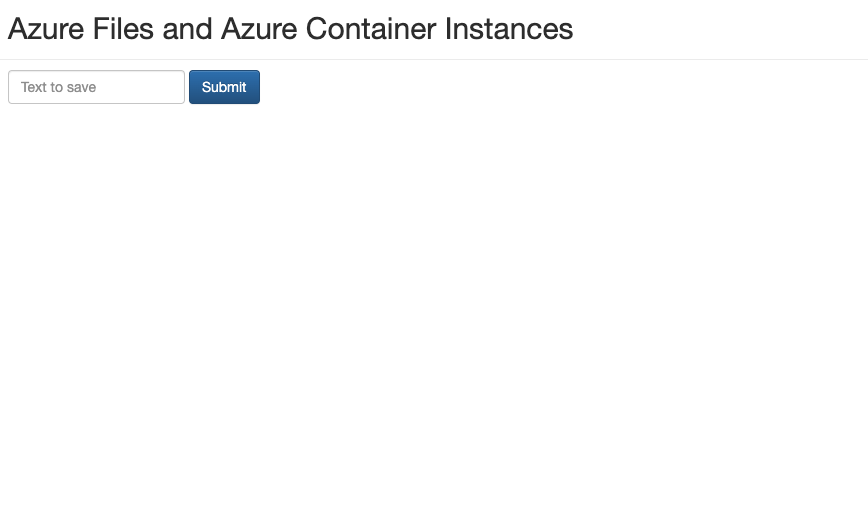
Enter some text into the form and select SUBMIT. This action creates a file that contains the text you entered in the Azure file share.
Now that you have created a container that saves data to a persistent fileshare, let’s access that data. In order to access the data, you will need to download the file from the file share.
To get the files contained in your file share, run:
az storage file list -s myshare-<initials> -o table
To download a file (listed from the command above) to the Cloud Shell session, run:
az storage file download -s myshare-<initials> -p <filename>
Finally, to view the file, run:
cat <filename>
Your data now persists, irrelevant to what happens to the container. Additionally, you can mount your file share to other container instances to make that data available to them.